This past weekend was about biting the crafting bullet and doing those projects I have been dreaming of, in one case for years. I will start with the craft I have been procrastinating about for less time, only a few weeks.
Earlier this year I saw the Tula Pink Deja Vu Nightshade collection that was going to be released in July. More important to this tale, I saw the quilts that Tula Pink had created to go with the collection. Immediately my attention was caught by “The Still Room” and I started looking for how I could pre-order the pattern. In my months of searching it seemed that I could order the kit for $186 or wait until the collection launched and then purchase the pattern. I waited, impatiently, for the collection to launch. Imagine my surprise when not only did the collection launch but the pattern was FREE on https://freespiritfabrics.com/projects/?page=3. The link is directly to the page that contains the Tula Pink patterns but I recommend looking at all of the free patterns. That being said, I still procrastinated for a couple of weeks. Finally over the last week I looked through my fabric and started pulling types and colors that I thought might work. This past weekend I bit the crafting bullet and started cutting out one type of block at a time to sew together. Instead of following the cutting diagram and cutting out all of the pieces for all of the blocks I decided to start with the blocks that had large motifs that needed to be fussy cut. Before going any further I am going to disclaim, at this time I have not purchased any of the Tula Pink fabrics, this project was entirely out of stash. I do hope to purchase some of this collection for some of my English Paper Piecing to take advantage of the fussy cutting. That disclaimer aside I have finished these first 4 blocks and no two are the same size, and they certainly are not the size called for in the quilt diagram, but I will be able to add sashing and such to fix them up.
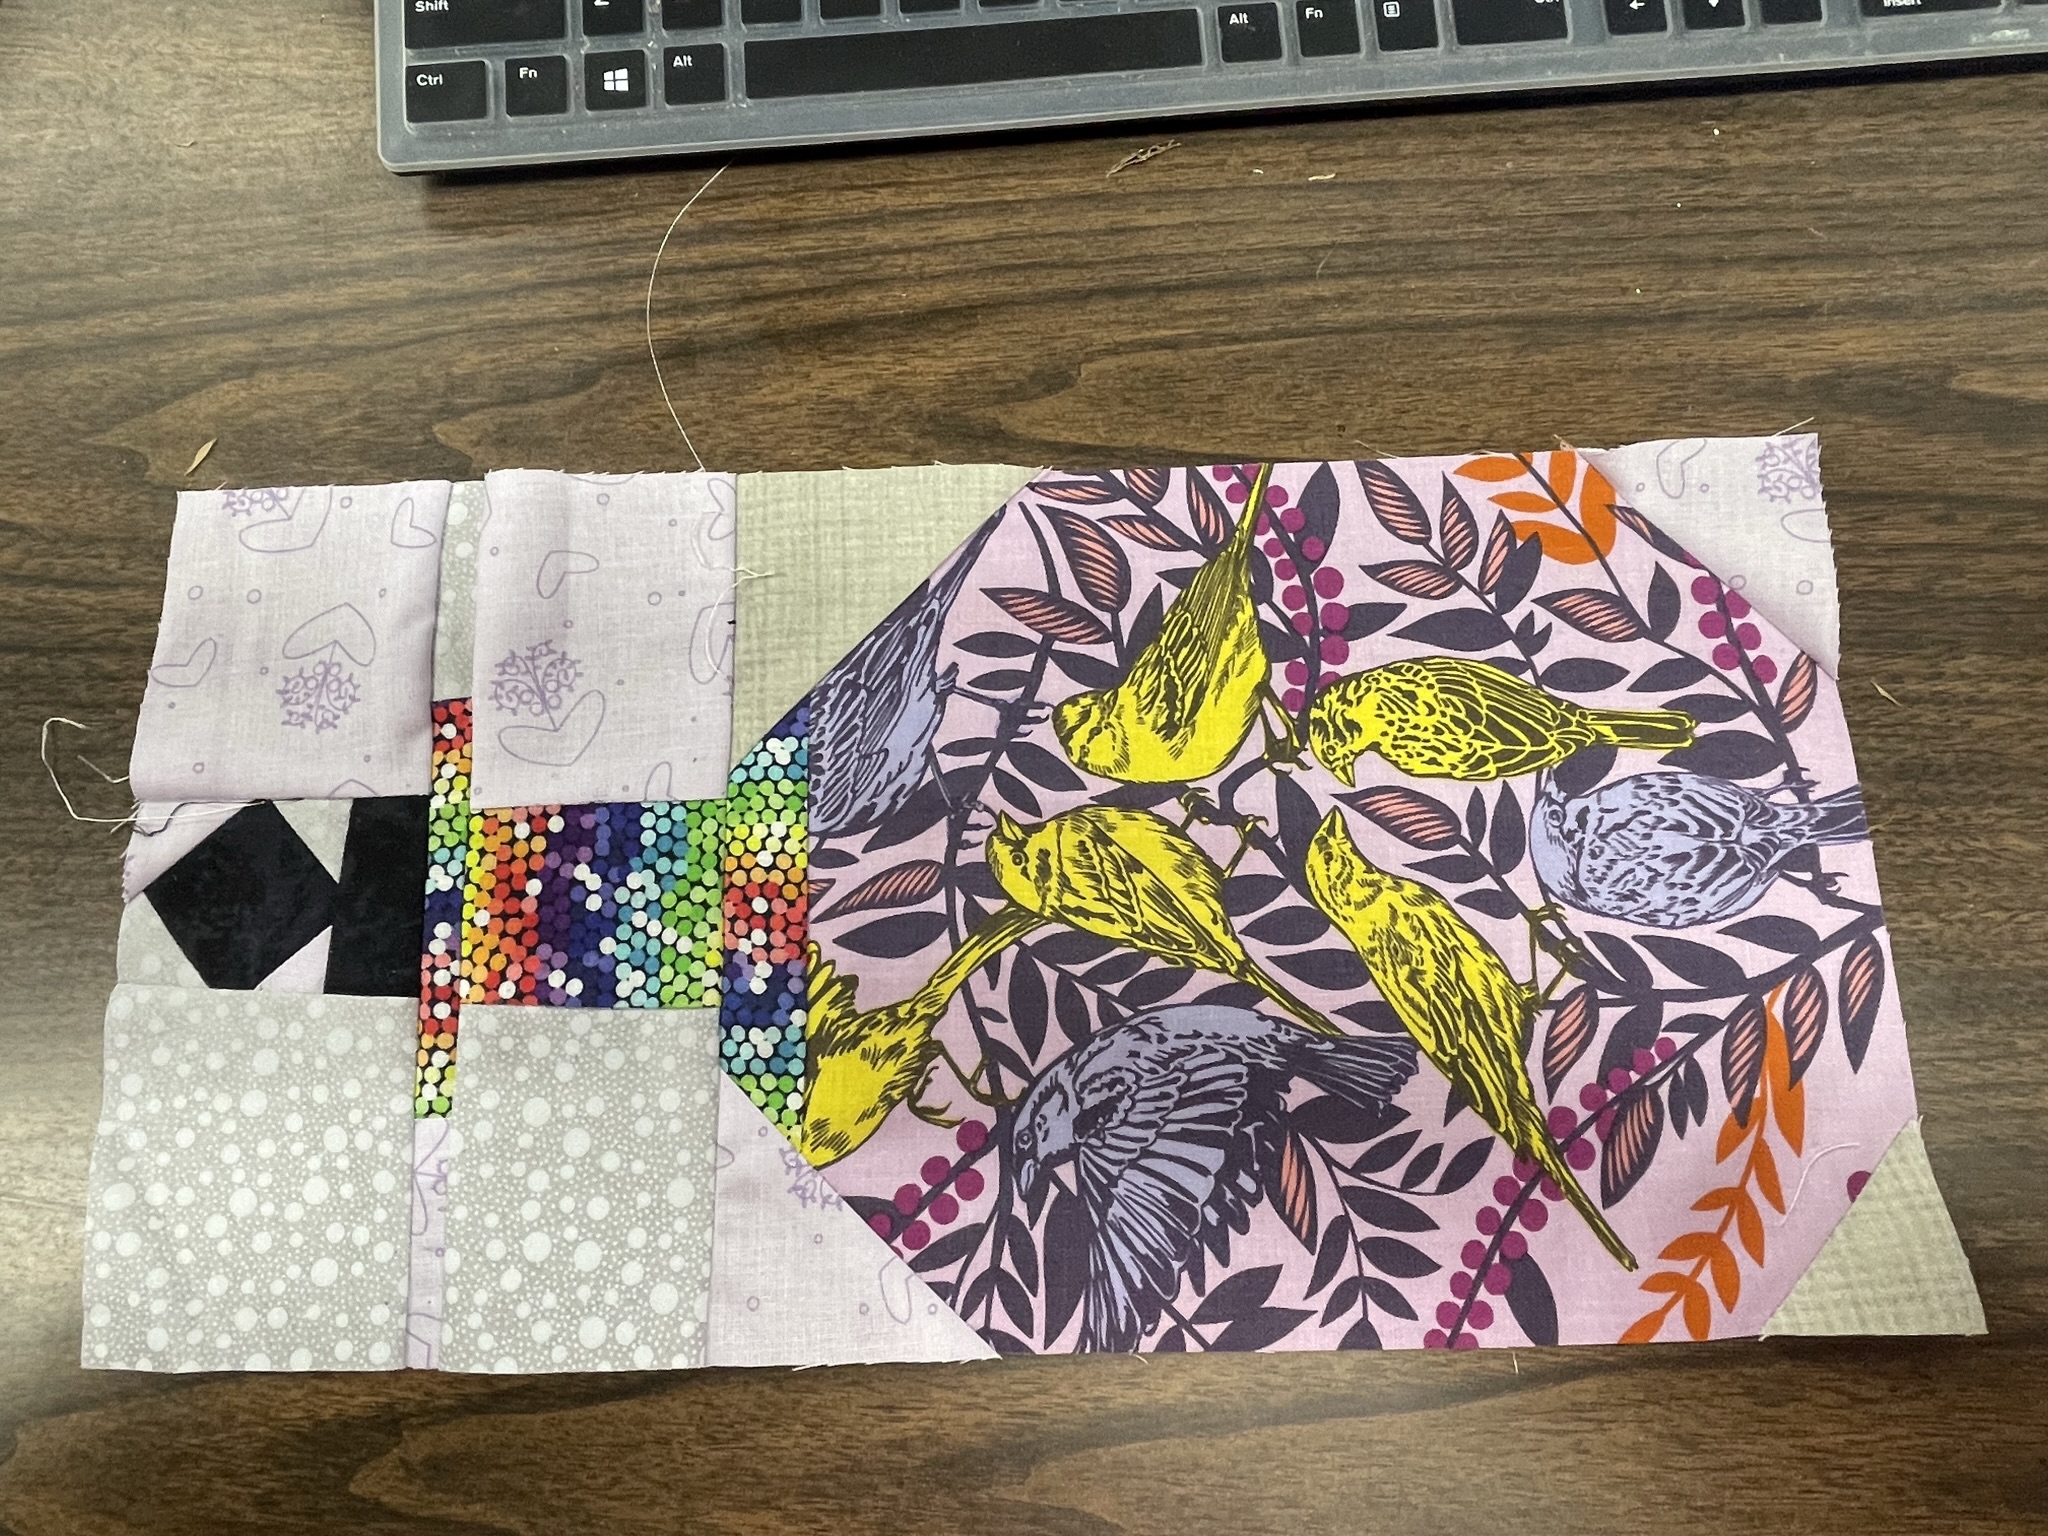

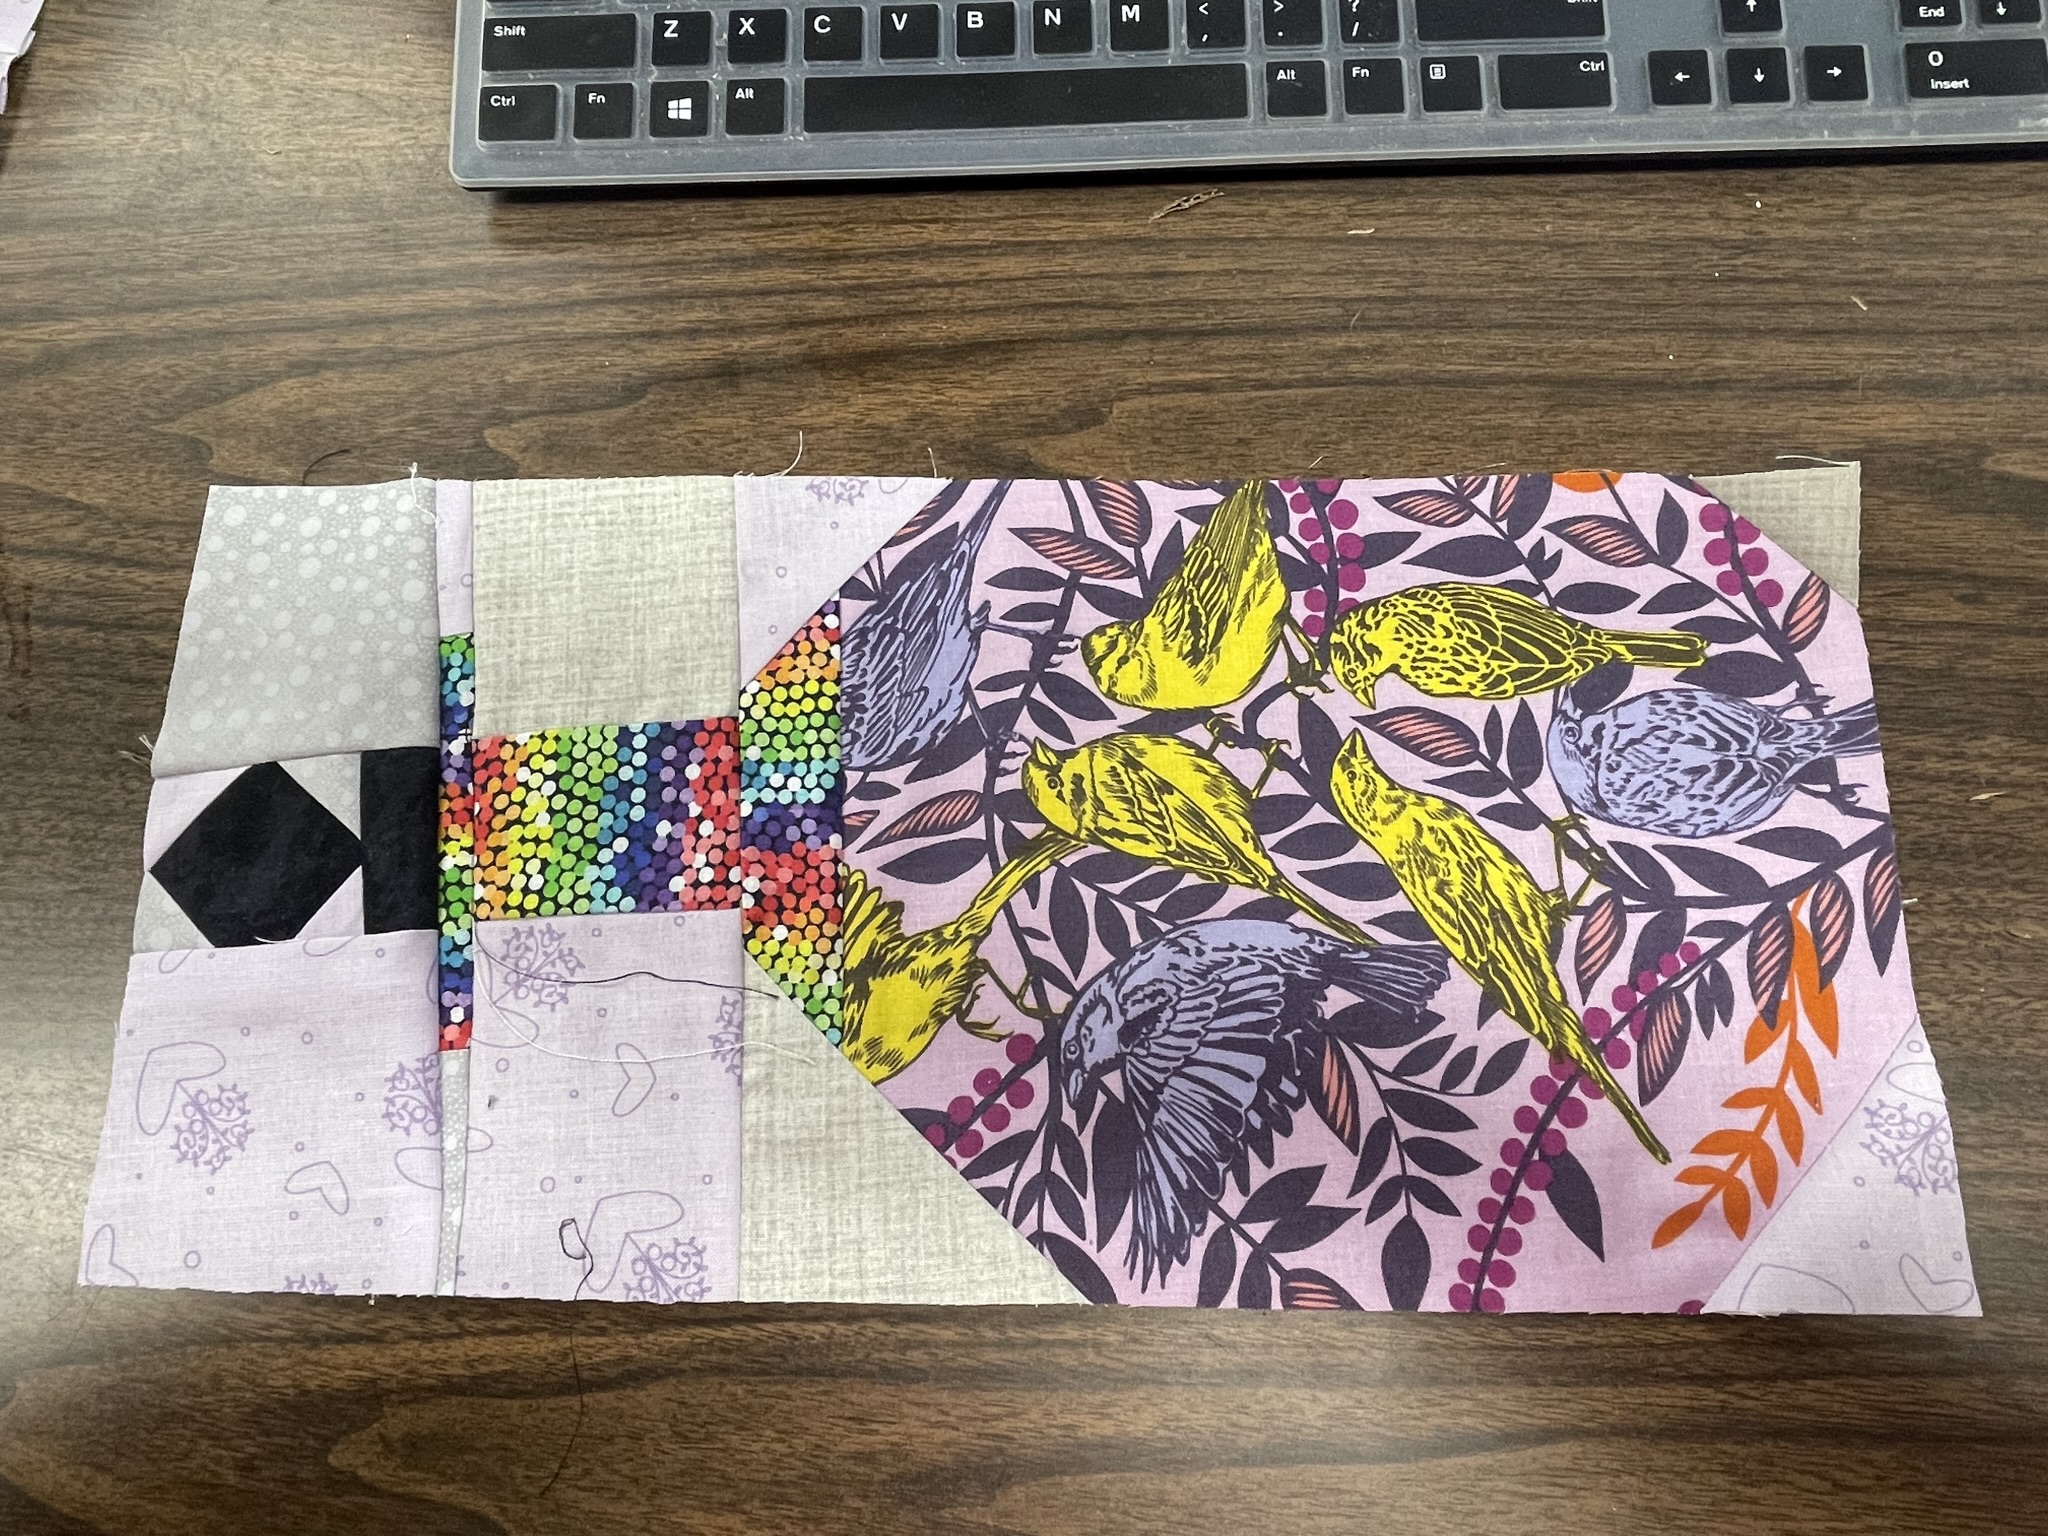
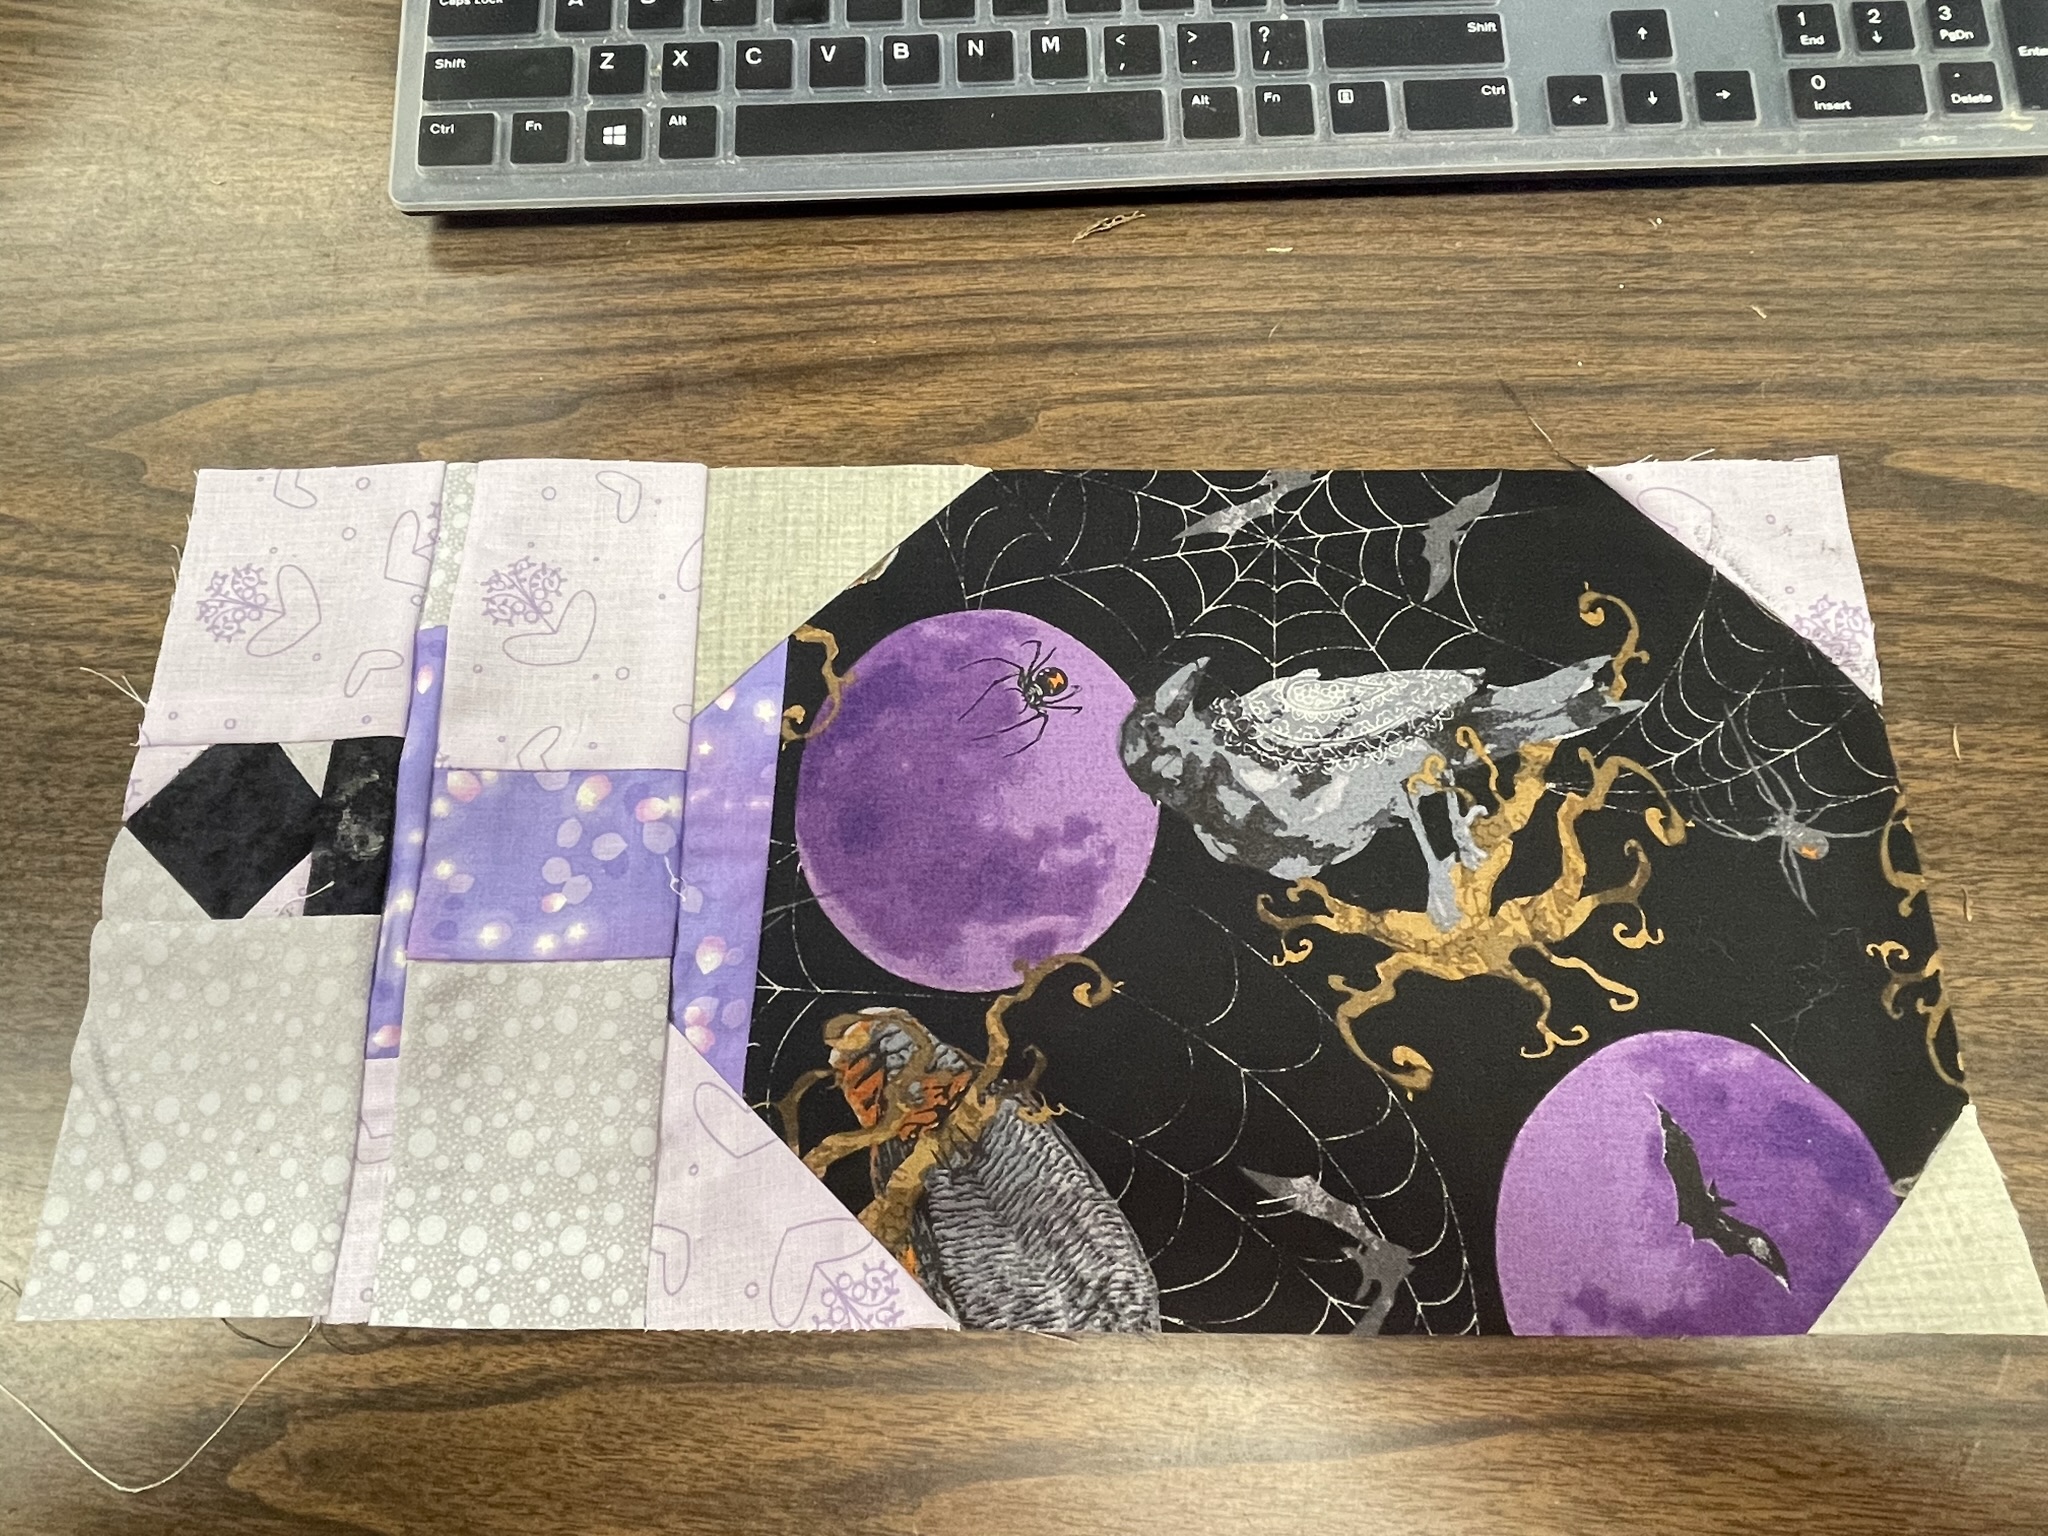
Honestly, I think getting these 4 blocks finished this past weekend is amazing, however that is not all that I did!
I had made up some paper pulp from shredded mail, the recycling this week is paper so I thought I would finally start shredding some. I learned several lessons, the first is to take out all of the plastic windows before shredding paper that you want to turn into pulp because the plastic will tangle around your stick blender and then you have to unplug it to get the plastic untangled. The second is that even if you let your pulp sit in water for 3 days (I’m hoping 4 is okay because I want to pull another couple of sheets tonight) it just gets better. I know that it will likely start to mold in another day or two but there were also instructions for drying the pulp so it can be used later. The method is much simpler than I thought, there are tons of tutorials on the web so I don’t think I will go over it again here. I did purchase the kit from Crafter.com as well as the video instructions included there. I’m looking for ways to make more sheets of paper than I currently have ‘couching’ sheets for, so keep an eye out for that. I do love how the shredded mail had some weird inclusions that added different colors to my finished paper.

That is all for this week so until next time remember to Live Life a Little More Abstract!
